
Planting
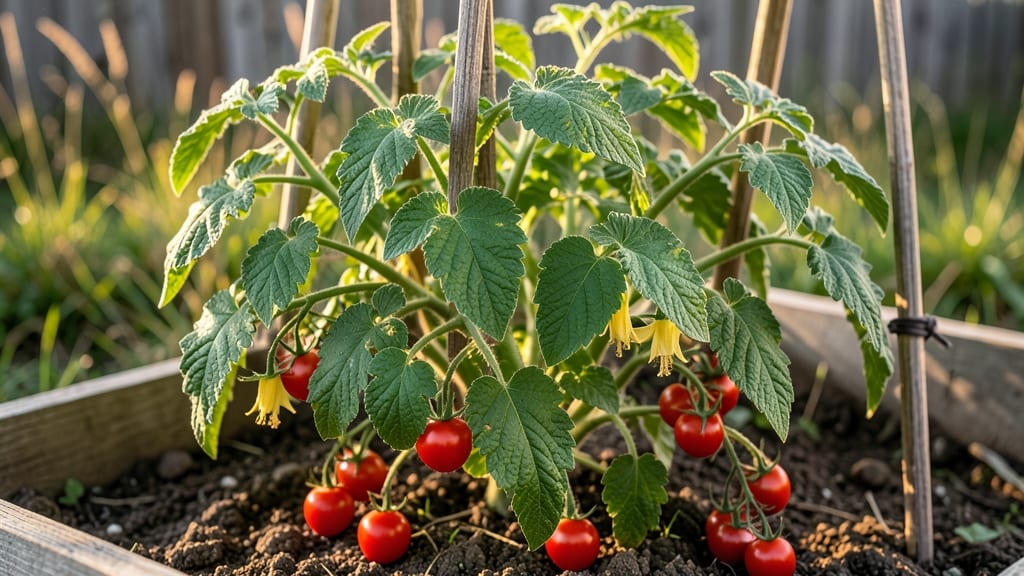
The yellowing leaf of a cherry tomato plant means your plants are screaming for help—don’t ignore them. 🌱 I’ve seen this happen when soil stays too wet, nutrients run low, or pests move in, and fixing it fast keeps your harvest thriving.
The key is spotting the pattern: is it yellowing between veins, curling edges, or tiny holes? That tells you exactly what’s wrong.
Start with the basics: check the soil moisture—it should feel damp but not soggy. If leaves yellow between veins, it’s likely iron deficiency (common in alkaline soil), while curling edges often mean too much water or heat stress.
For pests, look for tiny webs or chewed edges—aphids and spider mites are the usual culprits. A quick spray of soapy water or neem oil can save your plants in minutes.
Once you’ve identified the issue, act fast: prune affected leaves to redirect energy, adjust watering, and add compost or a balanced fertilizer. I’ve revived plants in just a week with these simple steps—no fancy tools needed. The goal is to keep your tomatoes growing strong, not just fixing the leaves.
Prevention is easier than fixing: mulch to keep soil moist, water at the base (not the leaves), and rotate crops next season. A healthy plant is your best defense against yellowing leaves. Let’s get those tomatoes back on track!
📚 In This Guide
- What you need
- Instructions
- Tips and common mistakes
- Wrapping up and next steps
What you need
- ● Cherry tomato plant – Any variety (e.g., Sweet 100, Sun Gold, or Roma). 1-3 plants depending on your setup.
- ● Pruning shears or sharp scissors – Disinfected with rubbing alcohol (70% or higher) to prevent disease spread.
- ● Garden trowel or small shovel – For gently loosening soil if root issues are suspected.
- ● pH testing kit – Digital or liquid test strips to check soil pH (ideal: 6.0–6.8 for tomatoes).
- ● Balanced fertilizer – 10-10-10 or 5-5-5 NPK ratio (organic options like composted manure or worm castings work too!).
- ● Watering can or hose with adjustable nozzle – For deep, even watering (avoid overhead sprinklers).
- ● Magnifying glass – To inspect leaves for pests (e.g., aphids, spider mites) or fungal spores.
- ● Notebook & pen – To track symptoms, treatments, and progress over time.
- ○ Ruler or measuring tape – Optional, for monitoring leaf size changes.
- ● Fungal spray – Copper-based or neem oil blend (for early signs of blight or mildew).
- ● Mulch (straw or shredded leaves) – To retain moisture and regulate soil temp.
- ● Soil moisture meter – To avoid over/under-watering.
- ● Houseplant spray bottle – For diluted neem oil or hydrogen peroxide (3%) treatments.
How to diagnose and fix yellowing cherry tomato leaves
Here’s how I quickly identify and reverse yellowing leaves—no guesswork, just action.
🌿 Step 1: Check Watering Patterns
Yellow leaves often start with inconsistent watering. Cherry tomatoes need 1-1.5 inches of water weekly, but uneven moisture causes stress. Stick your finger 1 inch into the soil—if it feels dry, water deeply until it drains from the bottom. If it’s soggy, hold off until the top inch feels dry to touch.
I water in the morning so leaves dry quickly—wet foliage overnight invites fungal diseases that worsen yellowing. You’ll see leaves perk up within 24-48 hours if watering was the issue. Use a drip irrigation system if your schedule varies; it delivers steady moisture without over-saturating.
☀️ Step 2: Assess Light Exposure
Leggy growth and pale yellowing often mean your plant isn’t getting enough light. Cherry tomatoes thrive in 6-8 hours of direct sun daily. If leaves are yellowing from the bottom up with long stems, move the plant to a sunnier spot or supplement with a grow light 6-12 inches away for 14-16 hours daily.
Watch for leaves cupping or burning along edges—this signals too much sun. In that case, provide afternoon shade with a sheer curtain. Strong, deep green leaves with short stems indicate perfect light. I adjust my plants weekly to match the sun’s arc, especially in partial shade.
🌱 Step 3: Test for Nutrient Imbalance
Yellowing between leaf veins (chlorosis) usually means a nitrogen deficiency. Grab a soil test kit—if pH is below 6.0 or above 7.0, amend with lime (to raise pH) or sulfur (to lower pH). For quick fixes, mix ½ cup of compost into the top 6 inches of soil around the base.
Over-fertilizing can also cause yellowing, especially with high-nitrogen feeds. I switch to a balanced 10-10-10 fertilizer every 4-6 weeks and water it in thoroughly. New growth should turn vibrant green within 1-2 weeks if nutrients were the issue.
✂️ Step 4: Inspect for Pests or Disease
Yellowing paired with sticky residue or tiny webs means aphids or spider mites. Spray leaves with a soapy water solution (1 tsp mild soap per quart of water) and rinse thoroughly. For fungal issues like early blight (brown spots with yellow halos), remove affected leaves immediately and apply copper fungicide every 7-10 days.
I always check the undersides of leaves first—pests hide there. Healthy leaves should feel firm and free of spots. If yellowing persists after 3 days of treatment, the problem might be root-bound. Gently loosen roots in the pot or transplant to a container 2 inches larger if growing in soil.
Tips & tricks for reviving cherry tomato leaves
Here's what nobody tells you about turning that yellowing mess into lush, green foliage—fast.
Soil Test Shortcut: If you don't have a soil test kit, grab a handful of soil from the root zone and mix it with water in a clear jar. If the water stays clear, your soil is likely too alkaline (pH >7.0) and needs sulfur. If it turns cloudy, it's acidic (pH <6.0) and needs lime. This simple trick saves you the $20 test kit while giving you the same information. The pH fix should show improvement in 1-2 weeks once you've amended the soil.
Light Adjustment Hack: When supplementing with grow lights for the 14-16 hours daily mentioned in Step 2, position the light so it's 12 inches away from the tallest leaves—not the center. This prevents uneven growth where leaves closest to the light burn while others stay pale. I rotate my plants quarter-turn daily to ensure even exposure, which prevents that lopsided, leggy look.
Pest Prevention: The soapy water solution in Step 4 works wonders, but here's the pro move: add 1 teaspoon of neem oil to that quart of soapy water. Neem oil disrupts pests' life cycles while being safe for plants. Spray in the evening when bees aren't active, and repeat every 7 days as a preventative measure. You'll notice fewer pests within 3-5 days of consistent use.
Root-Bound Rescue: If you suspect your plant is root-bound after 3 days of no improvement, try this before repotting: Make two vertical slits about 1 inch deep in the sides of the root ball with a sterilized knife. This encourages new root growth without disturbing the plant. Water thoroughly after slitting, and you should see fresh green leaves emerging from the base within 7-10 days.
Pro Tips for Cherry Tomato Plant Leaf
- Here's what nobody tells you about turning that yellowing mess into lush, green foliage—fast.
- Soil Test Shortcut: If you don't have a soil test kit, grab a handful of soil from the root zone and mix it with wate...
- Light Adjustment Hack: When supplementing with grow lights for the 14-16 hours daily mentioned in Step 2, position th...
Frequently asked questions
Got questions about your cherry tomato plant’s leaves? You’re not alone!
Here are answers to the most common concerns—so you can keep your plants thriving and your harvests happy.
Why are my cherry tomato plant leaves turning yellow?
Yellowing leaves (a condition called chlorosis) usually mean overwatering, nutrient deficiency (like nitrogen or magnesium), or poor drainage. Check the soil moisture—it should feel damp but not soggy. If the yellowing starts at the edges, it’s often a sign of underwatering or transplant shock. For a quick fix, flush the soil with water to remove excess salts and fertilize with a balanced tomato feed.
How long does it take for cherry tomato leaves to recover from yellowing?
Recovery time depends on the cause! If it’s overwatering, you might see improvement in 3–7 days once you adjust care. For nutrient deficiencies, like lack of magnesium (yellow patches between leaf veins), it can take 2–4 weeks to see full recovery after applying Epsom salt or a chelated fertilizer. Patience is key—don’t rush to prune affected leaves unless they’re completely dead.
Can I still harvest cherry tomatoes if the leaves are yellow?
Yes! Yellow leaves won’t ruin your tomatoes—focus on the fruit, not the foliage. In fact, pruning severely yellowed leaves can improve airflow and reduce disease risk. Just avoid harvesting from branches with blackened or wilted leaves, as this could signal blight or another serious issue. Keep an eye on the plant’s overall health to ensure your tomatoes stay juicy and sweet.
What’s the best fertilizer for cherry tomato plants with yellow leaves?
For general yellowing, use a balanced fertilizer (like 10-10-10) to address overall nutrient needs. If leaves show interveinal yellowing (yellow between veins), it’s likely a magnesium deficiency—sprinkle 1 tablespoon of Epsom salt per gallon of water every 2 weeks. For pale yellow leaves, try a high-nitrogen fertilizer (like fish emulsion) to boost green growth.
Are there any natural remedies for yellowing cherry tomato leaves?
Try these DIY fixes before reaching for chemicals:
- Compost tea: Brew compost in water for 24–48 hours, strain, and use as a soil drench to replenish microbes and nutrients.
- Banana peel water: Steep banana peels in water for a week to create a potassium-rich fertilizer (great for root health).
- Coffee grounds: Mix used grounds into the soil to improve drainage and add nitrogen—just don’t overdo it!
Wrapping up and next steps
Caring for your cherry tomato plant’s leaves doesn’t have to be stressful—just a little attention goes a long way! 🌱 Whether it’s overwatering, nutrient deficiencies, or pests, you now have the tools to diagnose and fix yellowing leaves fast.
With the right adjustments, your plant will bounce back, and you’ll soon be enjoying a bountiful harvest of sweet, juicy tomatoes.
Ready to take action? Start by checking your plant’s roots and soil today—your future tomato feast depends on it! 🍅✨