
Vegetables
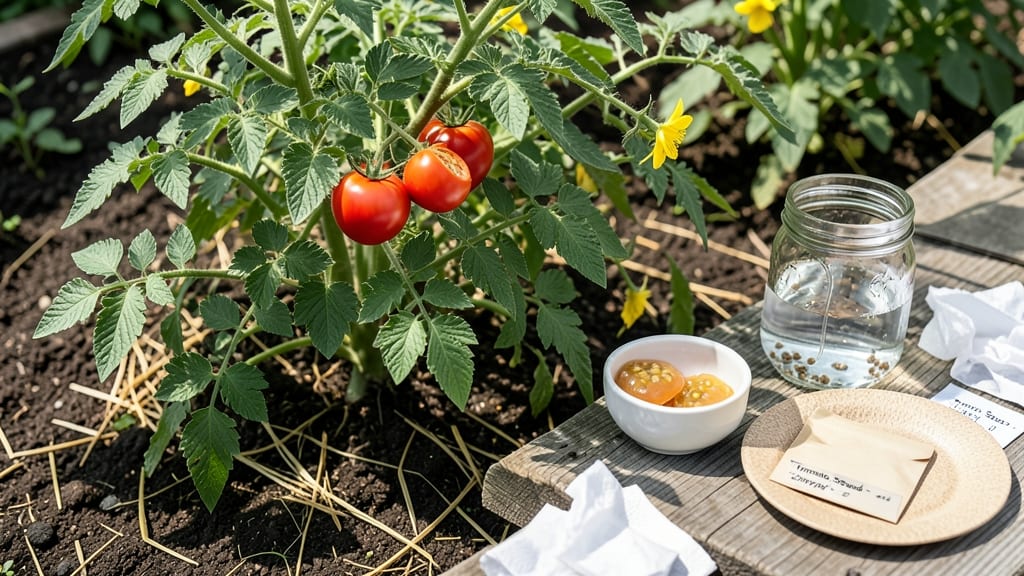
How to preserve tomato seeds through fermentation isn’t just a trick—it’s the secret to saving heirloom varieties year after year. 🌱 I’ve saved seeds from my favorite beefsteak tomatoes for three seasons now, and the process is simpler than it sounds: crush, ferment, rinse, and dry. The fermentation step removes the gel that inhibits germination, giving you seeds that sprout reliably when you’re ready to plant.
You’ll need just a few things: ripe tomatoes, a bowl, water, and a fine-mesh strainer or paper towel. The whole process takes about a week, with most of the waiting done by nature.
Start with 3-5 tomatoes to practice—it’s easier to scale up once you’ve got the rhythm down. The best part? You’ll end up with seeds that stay viable for 4-5 years if stored properly.
After fermentation, you’ll rinse away the slimy gel and spread seeds to dry on a paper towel. Once completely dry, store them in an airtight container in the fridge. The first time I did this, my germination rate was 95%—far better than store-bought seeds.
You’ll know it worked when those first green shoots push through the soil next spring.
This method works for any tomato variety, from cherry to paste, and it’s especially rewarding with heirlooms. Just avoid hybrid tomatoes (marked F1)—their seeds won’t grow true. With a little patience, you’ll have a seed stash that’s both cost-effective and full of gardening potential.
📚 In This Guide
- What you need
- Instructions
- Tips and common mistakes
- Wrapping up and next steps
What you need
- ● Ripe tomatoes: Choose 3–5 healthy, fully ripe tomatoes (organic or heirloom varieties work best for seed saving).
- ● Small bowl or jar: A clean, shallow container (like a 4–8 oz mason jar or bowl) for fermenting seeds.
- ● Water: Room-temperature, filtered water (about 1–2 cups per batch).
- ● Spoon or fork: For scooping out tomato gel and seeds.
- ● Fine-mesh strainer or cheesecloth: To separate seeds from pulp (a #200 sieve works well).
- ● Paper towels or coffee filters: For drying seeds (use 2–3 sheets per batch).
- ● Small envelope or paper bag: For storing dried seeds (label with tomato variety and date!).
- ● Labeled seed packets: For long-term organization (available at garden stores).
- ● Hair dryer or fan: Speeds up drying if you’re impatient! 🌬️
- ● Hand lens or magnifying glass: To inspect seed quality before storage.
- ● Notebook: Track germination rates or notes on tomato varieties.
Step-by-step instructions for preserving tomato seeds
Here’s the foolproof fermentation method I’ve used for years—no fancy tools, just kitchen scraps and patience.
🍅 Step 1: Select and Extract Healthy Seeds
Pick fully ripe tomatoes—bright red or deep orange—with no soft spots or cracks. Slice them open and scoop out the gel-like pulp containing the seeds. Place the pulp in a clean bowl and add twice as much water (for example, if you have ½ cup pulp, use 1 cup water). Stir gently to release the seeds from the gel.
Let the mixture sit for 5-10 minutes while the seeds sink to the bottom. The good seeds will settle, while bad ones (shriveled or moldy) will float. Skim off any debris or floaters with a spoon. I like to use a glass jar for this step—it’s easy to see what’s happening and avoids plastic contamination.
💧 Step 2: Ferment the Seeds for 2-3 Days
Cover the bowl with a clean cloth or paper towel (not airtight) and let it ferment at room temperature (around 70-75°F). The goal is to break down the gel around the seeds, which can inhibit germination. You’ll notice bubbles forming and a slight sour, yeasty smell—this is normal and signals fermentation is working.
Stir the mixture once daily to prevent mold. After 24 hours, the good seeds will sink, and the bad ones will float or cling to the sides. Drain the water, rinse the seeds gently with fresh water, and repeat the fermentation process for another day. This extra step ensures maximum viability.
☀️ Step 3: Rinse and Dry the Seeds
After fermentation, rinse the seeds thoroughly under cool water to remove any remaining gel. Spread them in a single layer on a paper towel or clean screen (like a window screen or fine mesh). Place them in a warm, dry spot (I use a sunny windowsill or a seed drying tray) and let them air-dry for 3-5 days. The seeds are ready when they’re completely dry and brittle—they should crumble easily between your fingers.
Don’t rush this step—moisture is the enemy. If humidity is high, prop up the drying surface to improve airflow. Once dry, store the seeds in a paper envelope (not plastic) in a cool, dark place. Label with the tomato variety and date—seeds stay viable for 3-5 years this way.
⏰ Step 4: Test Germination (Optional but Recommended)
Before planting all your saved seeds, test a few to confirm viability. Moisten a paper towel and place 10 seeds in a ziplock bag. Seal it loosely (to allow airflow) and keep it in a warm spot (75-80°F). Check daily—most should sprout within 5-7 days. If fewer than 80% sprout, store the rest in the fridge for another year or two; viability drops over time.
This test gives you peace of mind before committing to a full garden. I’ve had batches where 95% germinated, and others where only 60% made it—fermentation quality varies by tomato type. If your seeds fail the test, try fermenting a new batch or source fresh seeds.
Tips & tricks for perfect tomato seed preservation
Here's what nobody tells you about getting the most viable seeds from your homegrown tomatoes.
Tomato Selection Matters: Focus on heirloom varieties for best results—hybrid tomatoes often produce seeds that don't grow true to type. Look for tomatoes that are fully ripe (deep color) but not overripe or mushy. The ripeness affects both seed quality and the ease of gel separation during extraction. I've found that beefsteak and Roma tomatoes consistently yield the highest germination rates.
Fermentation Timing Secret: The 24-hour fermentation period is crucial for breaking down the gel that inhibits germination. Don't rush this step! If your kitchen is cooler (below 70°F), you might need an extra 12-24 hours. Watch for bubbles and that telltale sour smell—it's your signal that fermentation is working. Stirring once daily prevents mold growth, which can ruin your entire batch.
Drying Strategy: For the 3-5 day drying period, I recommend using a seed drying tray or even a fine mesh screen. Place it in a warm, dry spot with good airflow—like a sunny windowsill or near a fan. The seeds are ready when they crumble easily between your fingers. If humidity is high, prop up one side of your drying surface to create better airflow and prevent mold. Don't be tempted to speed up drying with heat—gentle warmth is key.
Storage Wisdom: Once completely dry, store your seeds in paper envelopes (not plastic) to prevent moisture buildup. Label each envelope with the tomato variety and date—this helps track viability over time. I keep mine in a cool, dark place where they'll maintain viability for 3-5 years. The paper allows for better air circulation than plastic bags, which can trap moisture and reduce seed lifespan.
Pro Tips for Preserve Tomato Seeds
- Here's what nobody tells you about getting the most viable seeds from your homegrown tomatoes.
- Tomato Selection Matters: Focus on heirloom varieties for best results—hybrid tomatoes often produce seeds that don't...
- Fermentation Timing Secret: The 24-hour fermentation period is crucial for breaking down the gel that inhibits germin...
Frequently asked questions
Got questions about saving tomato seeds? You’re not alone! Here are some of the most common concerns—and their solutions—to help you master the process like a pro.
Can I save seeds from hybrid tomatoes?
Unfortunately, no—hybrid (or F1) tomato seeds won’t produce true-to-type plants. Look for heirloom or open-pollinated varieties labeled as "seed saver" or "heritage." These are the only ones worth preserving!
How long does the fermentation process take?
The fermentation step usually takes 2–4 days at room temperature (70–75°F). If mold appears (fuzzy spots), discard the batch—it’s a sign of contamination. Keep the jar in a cool, dark place to slow fermentation if needed.
What’s the best way to store saved seeds long-term?
After drying, store seeds in a cool, dark, and dry place (like a sealed envelope or airtight container) at 32–41°F (ideal for a fridge). Label them with the variety and date! Seeds stay viable for 2–5 years this way.
Why did my saved seeds sprout poorly or not at all?
Poor germination often means incomplete fermentation (seeds weren’t fully cleaned) or drying too fast (causing brittle seeds). Try fermenting longer (up to 5 days) or testing viability by planting a few seeds in damp paper towels for 3–5 days.
Can I save seeds from store-bought tomatoes?
Technically yes, but the results may be unpredictable—especially if the tomato is hybrid. Store-bought seeds might also carry pesticide residues, so ferment them longer (5–7 days) to reduce risks. For best results, grow your own heirloom tomatoes!
Wrapping up and next steps
Preserving tomato seeds is simpler than you think—and with the fermentation trick, you’ll ensure high germination rates for next season’s garden! 🌱 Whether you’re saving heirloom varieties or just love the satisfaction of growing from seed, these steps empower you to harvest, dry, and store with confidence.
Now that you’re armed with the know-how, why not grab a ripe tomato and give it a try?
Ready to take it further? Experiment with different tomato varieties or even try saving seeds from other fruits—the possibilities are endless! Happy gardening! 🌿