
How To
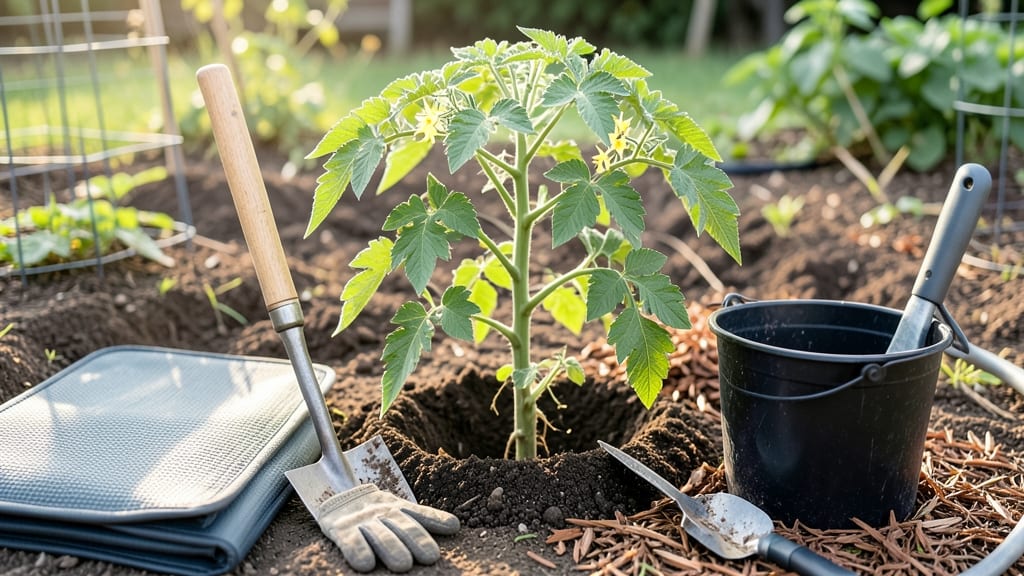
Transplanting tomato seedlings the right way means the difference between bushy, productive plants and struggling ones that take weeks to recover. I’ve moved dozens of seedlings—some thrived, others wilted within days—and the secret isn’t just timing, but how you handle those delicate roots.
The key is preparing the soil, supporting the stems, and giving them the perfect transition from pot to ground.
Start by hardening off seedlings for 7-10 days before transplanting, exposing them gradually to outdoor conditions. Dig holes twice as wide as the root ball, mix in compost, and plant deep—up to the first set of leaves—to encourage strong root growth.
Water thoroughly afterward, and shade the plants for a few days to reduce stress. This method works in most climates, but adjust timing based on your last frost date and soil temperature.
📚 In This Guide
- What you need
- Instructions
- Tips and common mistakes
- Wrapping up and next steps
What you need
- ● Tomato seedlings or young plants: 3–6 plants (depending on your garden size), with 2–3 true leaves and sturdy stems.
- ● Transplanting container or pot: A 5–10 gallon container per plant (or a large nursery pot for temporary holding).
- ● Well-draining potting mix: 2–3 bags (sterilized and rich in organic matter, like compost or coconut coir).
- ● Garden trowel or transplanting spade: A sharp, medium-sized tool for digging holes.
- ● Watering can or hose with a gentle spray nozzle: For hydrating roots without disturbing soil.
- ● Pruning shears or scissors: To trim damaged or overgrown foliage.
- ○ Balanced fertilizer (optional but recommended): A slow-release 10-10-10 or organic option like compost tea.
- ● Tomato cages or stakes: 2–3 per plant (6–8 feet tall) for support as they grow.
- ● Mulch (straw, grass clippings, or shredded leaves): To retain moisture and suppress weeds.
- ● Root stimulator or mycorrhizal fungi: A liquid or powder to encourage root growth post-transplant.
- ● Garden gloves: To keep hands clean and protect against thorns.
- ● Shade cloth (lightweight): For the first few days if transplanting in hot weather.
Step-by-step instructions for transplanting tomato plants
Here's my foolproof method for moving tomato seedlings without shock or setbacks.
Prepare the New Planting Site
Choose a location with full sun exposure (6-8 hours daily) and well-draining soil. Tomatoes thrive in slightly acidic to neutral soil with a pH between 6.0 and 6.8. Work in a 2-inch layer of compost into the top 12 inches of soil to improve fertility and drainage. If your soil is heavy clay, mix in 1 part sand or perlite to 3 parts soil to create a looser texture.
Dig holes twice as wide as the seedling's root ball but only as deep as the first set of true leaves. This prevents burying the stem too deeply, which can cause disease. Space plants 18-24 inches apart for determinate varieties and 24-36 inches apart for indeterminate types that grow taller. I always mark the spots with small sticks to avoid digging in the wrong place later.
Acclimate Seedlings to Outdoor Conditions
Before transplanting, harden off seedlings by placing them outside in a sheltered, shaded spot for 1-2 hours on the first day. Gradually increase their outdoor time by 1 hour daily over 7-10 days, slowly introducing more sunlight and wind. This mimics natural conditions and prevents transplant shock.
Watch for signs of stress like wilting or yellowing leaves—these mean the seedlings aren't ready yet. If nighttime temperatures drop below 50°F, cover them with a lightweight frost cloth to protect tender foliage. The goal is to have seedlings spending a full day outside by transplant day without wilting.
Remove Seedlings Carefully from Containers
Water the seedlings thoroughly the day before transplanting to reduce root disturbance. Gently squeeze the sides of the container to loosen the root ball, then tip the pot to slide the seedling out. If roots are circling tightly, use a knife to score the root ball and separate the roots slightly—this encourages outward growth instead of a tangled mass.
Hold the seedling by its leaves, not the stem, to avoid damaging the delicate tissue. Shake off excess soil to inspect the roots for any signs of rot or pests. If you see dark, mushy roots, trim them away with clean scissors and treat the plant with a fungicide before transplanting to prevent disease spread.
Transplant with Minimal Root Disturbance
Place each seedling into its prepared hole, ensuring the first set of true leaves sits just above soil level. Fill the hole with soil, pressing gently to eliminate air pockets but avoiding compaction. Water deeply to settle the soil and encourage roots to expand into the surrounding earth. A 1-gallon watering per plant ensures moisture reaches the roots without running off.
Mulch around the base of each plant with 2-3 inches of organic mulch, like straw or shredded leaves, to retain moisture and suppress weeds. Keep the mulch 2 inches away from the stem to prevent rot. Avoid piling mulch against the stem—this creates a damp environment that invites disease.
Support and Monitor for Strong Growth
Install cages or stakes immediately after transplanting to provide support for indeterminate varieties. Tie the main stem loosely to the stake with soft plant ties, leaving room to grow. For determinate tomatoes, a low cage or small stake suffices. Avoid tying too tightly—you want the plant to grow, not strangle.
Water deeply every 2-3 days until the soil is 6 inches deep and thoroughly moist. Avoid wetting the leaves to prevent fungal diseases like early blight. Within 7-10 days, you should see new growth as a sign the plants have established roots. If leaves yellow or wilt, increase watering frequency or check for pests like aphids or spider mites.
Tips & tricks for stress-free tomato transplanting
These practical insights will help you avoid common pitfalls and ensure your tomato plants thrive after transplanting.
Soil Preparation Strategy: When amending heavy clay soil with sand or perlite, mix it thoroughly into the top 12 inches of soil. I've found that using a broadfork or garden trowel helps break up compacted layers without disturbing the surrounding soil structure. This creates ideal drainage while preserving beneficial soil microbes. The goal is a crumbly texture that holds moisture without becoming waterlogged.
Hardening Off Insight: The 7-10 day hardening process is non-negotiable for robust transplants. I recommend starting the first day with just 1-2 hours of shade protection, then gradually move to partial sun by day 3. Watch for subtle signs like leaves slightly curling at the edges—this indicates they're adjusting well. If nighttime temperatures dip below 50°F during this period, use a lightweight frost cloth for just the first few nights to avoid shocking the plants.
Root Ball Technique: Before scoring tightly rooted seedlings, I always check for root binding by gently squeezing the container. If roots spiral tightly, make 2-3 shallow vertical cuts around the root ball with a clean knife—this encourages outward growth. For extra-large seedlings, you can even loosen the center slightly to prevent girdling as they establish. Remember, the goal is to minimize root disturbance while maximizing root expansion into new soil.
Post-Transplant Care: After the initial 1-gallon watering, I've found that applying a 2-inch layer of mulch around (not touching) the stem creates a microclimate that retains moisture and regulates soil temperature. For the first week, I water deeply every 2 days rather than daily shallow waterings to encourage deep root development. This mimics natural rainfall patterns and prevents surface crusting that can suffocate new roots.
Pro Tips for Transplant Tomato Plants
- These practical insights will help you avoid common pitfalls and ensure your tomato plants thrive after transplanting.
- Soil Preparation Strategy: When amending heavy clay soil with sand or perlite, mix it thoroughly into the top 12 inch...
- Hardening Off Insight: The 7-10 day hardening process is non-negotiable for robust transplants. I recommend starting ...
Frequently asked questions
When is the best time to transplant tomato seedlings?
Transplant your seedlings after the last frost when soil temps hit 60°F (15°C) or warmer. Wait until they’ve developed 2-3 true leaves and are at least 4-6 inches tall. Early morning or late afternoon transplanting reduces stress from heat.
How long after transplanting will tomatoes start producing fruit?
Most tomato varieties take 60-80 days from transplanting to produce fruit, but this depends on the type (determinate vs. indeterminate) and growing conditions. Indeterminate varieties (like cherry tomatoes) may continue producing all season if pruned and supported!
What if my tomato plants wilt after transplanting?
Wilting is normal for 1-3 days as plants adjust. Keep soil consistently moist (not soggy) and avoid direct sun for 24 hours. If wilting persists beyond 3 days, check for root damage or pests. A light mulch layer helps retain moisture.
Can I transplant tomatoes into containers or just the ground?
Tomatoes thrive in 5-gallon+ containers with drainage holes. Use a lightweight potting mix and stake or cage plants for support. Just ensure containers get 6-8+ hours of sun daily. Dwarf varieties (like ‘Tiny Tim’) are ideal for pots!
What should I do if my transplanted tomatoes have yellow leaves?
Yellow leaves often signal overwatering, nutrient deficiency, or transplant shock. Check soil moisture (it should be damp, not wet) and fertilize with a balanced 10-10-10 or tomato-specific feed 2 weeks post-transplant. Lower leaves yellowing naturally as plants mature—focus on new growth.
Do I need to harden off seedlings before transplanting?
Yes! Hardening off (acclimating seedlings to outdoor conditions) takes 5-7 days. Start by placing them in partial shade for 1-2 hours daily, gradually increasing sun exposure. Skip this step, and seedlings may shock or bolt prematurely.
Wrapping up and next steps
Transplanting tomato plants might seem intimidating at first, but with the right prep and care, you’ll soon be harvesting juicy, homegrown tomatoes! 🌱 The key is timing, gentle handling, and proper aftercare—whether you’re moving seedlings from pots to soil or relocating them to a new garden spot.
Remember, healthy roots mean stronger plants, and a little patience goes a long way.
Now that you’re armed with the know-how, roll up your sleeves and get planting! Keep an eye on your tomatoes, adjust as needed, and soon you’ll be enjoying the sweet rewards of your hard work. Happy gardening! 🍅✨