
Companion Plants
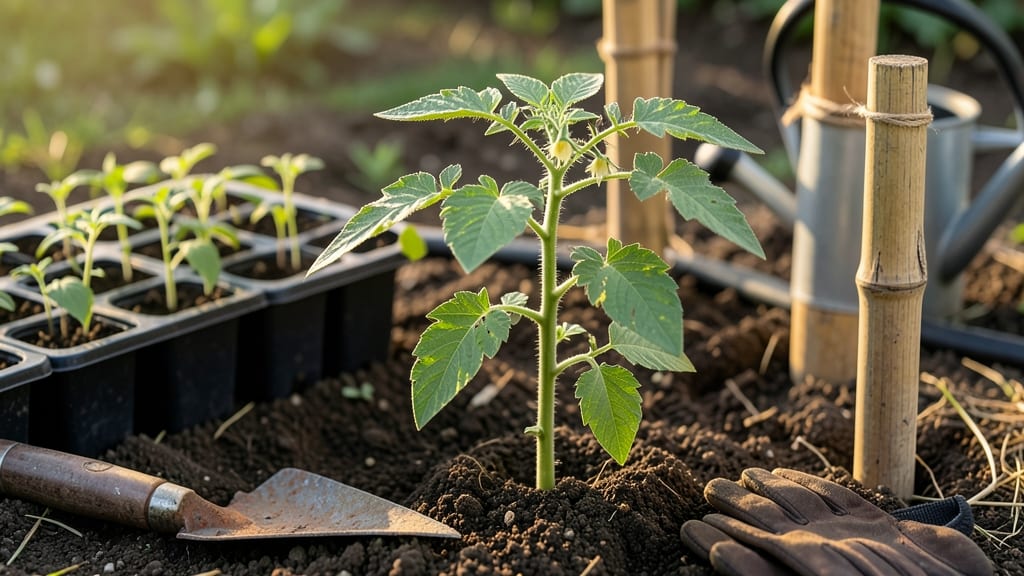
Planting young tomato plants at the right time means the difference between a bountiful harvest and sad, stunted vines. 🌱 I learned this the hard way when my first batch of seedlings bolted after a late frost—now I time it precisely by USDA zone, soil temperature, and leaf count to ensure strong, disease-resistant plants that thrive all season.
Start by checking your last frost date (find it online or ask your local nursery) and wait until nighttime temperatures stay above 50°F consistently—that’s usually 2-3 weeks after your zone’s last frost.
Healthy seedlings should have 4-6 true leaves and sturdy stems (not leggy or yellowing), and you’ll need well-draining soil, stakes or cages, and a sunny spot that gets 6-8 hours of light daily.
Dig holes just deep enough to bury the stem up to the first leaves (this encourages root growth), space plants 18-24 inches apart, and water deeply right after planting to settle the soil.
Mulch with straw or grass clippings to retain moisture and prevent soil-borne diseases—this simple step cuts down on watering by 30% and keeps vines strong through heat waves.
After the first week, focus on consistent watering (1-2 inches per week) and fertilizing lightly with compost or balanced 10-10-10 fertilizer every 2-3 weeks. Avoid common mistakes like overwatering (which causes blossom end rot) or planting too deep (which can rot stems).
With these steps, your tomatoes will grow taller, faster, and more productive than you’ve ever seen.
📚 In This Guide
- What you need
- Instructions
- Tips and common mistakes
- Wrapping up and next steps
What you need
- ● Young tomato plants: 3–6 healthy seedlings (depending on space), with 2–3 true leaves (avoid leggy or overcrowded ones).
- ● Garden soil: Well-draining, loose soil amended with compost (aim for a pH of 6.2–6.8).
- ● Fertilizer: Balanced 10-10-10 or 5-10-10 fertilizer (follow package rates).
- ● Organic options: Composted manure, worm castings, or a slow-release tomato fertilizer.
- ● Planting containers or garden bed: For containers: 5–7 gallon pots with drainage holes (1 plant per container).
- ● For in-ground planting: Loosen soil to a depth of 12–18 inches and space plants 18–24 inches apart (or 24–36 inches for indeterminate varieties).
- ● Planting tools: Trowel or hand shovel for digging.
- ● Garden gloves (to protect your hands from thorns and soil).
- ● Mulch: Straw, shredded leaves, or black plastic (to retain moisture and suppress weeds).
- ● Watering can or hose with a gentle spray nozzle.
- ● Cage or stakes: 5–6 foot tall tomato cages or sturdy bamboo stakes (for support as vines grow).
- ● Epsom salt: 1 tablespoon dissolved in a gallon of water (for magnesium boost, especially in sandy soils).
- ● Plant collars or markers: To label varieties and track progress.
- ● Shade cloth: Lightweight fabric (for protecting seedlings from sudden heat after transplanting).
- ● Companion plants: Basil, marigolds, or borage (to deter pests and improve growth).
Step-by-step instructions for planting young tomato plants
Timing and technique make all the difference—here’s how to transplant seedlings so they thrive from day one.
⏰ Step 1: Time Transplanting by Your USDA Zone
Tomatoes are frost-sensitive, so wait until the soil reaches at least 60°F and nighttime temperatures stay above 50°F consistently. In USDA Zones 1-5, aim for 2-3 weeks after your last frost date—check your local average for accuracy. I always verify by watching the weather forecast for a 3-day stretch of warm nights before planting.
Use a soil thermometer to confirm—cold soil slows root growth and stresses young plants. In Zones 6-10, you can plant earlier, but avoid transplanting if heavy rains or storms are forecasted. The goal is to give roots time to establish before summer heat arrives.
🪴 Step 2: Prepare the Planting Site
Choose a location with full sun (6-8 hours daily) and well-draining soil. Tomatoes hate soggy roots, so amend heavy clay with 2-3 inches of compost mixed into the top 6-8 inches of soil. I dig a hole slightly wider than the root ball to encourage outward root spread—this prevents the classic "tomato jail" where roots circle the stem.
If your soil tests acidic, add pelletized lime to raise the pH to 6.2-6.8. Avoid fresh manure—it burns roots. Instead, I use a balanced organic fertilizer (10-10-10) sprinkled around the hole, but not touching the roots. This gives them a slow-release nutrient boost without shock.
🌱 Step 3: Transplant Seedlings Carefully
Handle seedlings by their leaves only—never the stems—to avoid damaging fragile tissues. Gently loosen the root ball if it’s tightly bound, then place the plant in the hole so the top set of leaves sits just above soil level. Burying stems too deep can cause rot, while planting too high stresses the plant.
Fill the hole with soil, pressing lightly to remove air pockets. Water deeply (1-2 inches) immediately to settle roots and eliminate gaps. I like to add 1 inch of mulch (straw or shredded leaves) around the base to retain moisture and suppress weeds—just keep it 2-3 inches away from the stem to prevent rot.
☀️ Step 4: Support and Protect New Plants
Install stakes or cages at planting time—driving them in later risks damaging roots. For indeterminate varieties, use 6-foot stakes and tie the main stem loosely with soft cloth strips. Prune suckers (side shoots) when they reach 4-6 inches to direct energy to fruit production.
Shade young plants during the first 1-2 weeks if your zone experiences intense afternoon sun (110°F+). A lightweight row cover or even a piece of cheesecloth stretched over a frame works. This prevents sunburn and helps them acclimate gradually. Remove the cover once they show new growth.
💧 Step 5: Water and Monitor for Success
Water deeply every 2-3 days until the top 2 inches of soil feel dry. Overwatering is worse than underwatering—tomatoes need consistent moisture, not soggy conditions. I water at the base in the early morning to reduce evaporation and fungal risks. Avoid wetting leaves to prevent diseases like early blight.
Watch for new leaves within 7-10 days—this signals successful transplanting. If leaves yellow or wilt, it’s often transplant shock. Give the plant 1-2 weeks to recover before fertilizing again. Yellowing lower leaves are normal as the plant matures, but crispy edges mean it’s thirsty or needs shade.
Tips & tricks for planting young tomato plants
Here's what nobody tells you about getting your tomato seedlings off to the best possible start.
Zone-Specific Timing: In Zones 1-5, those 2-3 weeks after your last frost date can feel like an eternity, but don't rush it. I've seen firsthand how plants transplanted too early in cool soil struggle to establish roots. The 60°F soil temperature threshold isn't just a number—it's when soil microbes become active enough to support root growth. If you're in doubt, use a soil thermometer for 3 consecutive mornings before planting.
Root Ball Preparation: That classic "tomato jail" scenario where roots circle the stem happens when you don't loosen the root ball properly. I take a moment to gently tease apart the roots with my fingers—it takes about 30 seconds per plant but makes all the difference. For seedlings that seem tightly bound, soak the root ball in water for 10 minutes before transplanting to encourage root spread.
Shade Strategy: The 1-2 weeks of shade protection in hot zones is crucial, but don't make it too dark. A lightweight row cover or cheesecloth should reduce sunlight by about 30-50%. I've seen plants get sunburned under heavy covers that block too much light. Check daily—remove the cover when you see new growth indicating the plant is acclimating.
Watering Wisdom: Those 2-3 days between waterings can vary wildly depending on your climate. I check soil moisture by pushing my finger 2 inches into the soil—if it feels dry, it's time to water. The key is consistency: tomatoes hate both drought and soggy conditions. I've found that watering at the base in the morning gives roots time to absorb moisture before the heat of the day.
Pro Tips for Planting Young Tomato Plants
- Here's what nobody tells you about getting your tomato seedlings off to the best possible start.
- Zone-Specific Timing: In Zones 1-5, those 2-3 weeks after your last frost date can feel like an eternity, but don't r...
- Root Ball Preparation: That classic "tomato jail" scenario where roots circle the stem happens when you don't loosen ...
Frequently asked questions
Got questions about planting young tomato plants? You’re not alone—gardeners often wonder about the best timing, care, and tricks to ensure a bountiful harvest. Here are answers to some of the most common queries to help you get started with confidence!
When is the exact last frost date for my USDA zone?
Check the Old Farmer’s Almanac or your local cooperative extension service for precise dates. Generally, wait until after the last frost (when nighttime temps stay above 50°F/10°C) to plant. In colder zones (3-5), use frost cloth or plant in containers for flexibility.
Can I plant tomato seedlings too early?
Yes—but with caution! If nighttime temps dip below 50°F (10°C), seedlings can suffer stunted growth or even die. Harden off seedlings first (acclimate them to outdoor conditions over 5–7 days) and use row covers if frost is a risk. Pro tip: Start seeds indoors 6–8 weeks before your last frost for a head start!
What if I don’t have a garden bed—can I grow tomatoes in containers?
Tomatoes thrive in containers (5+ gallons per plant) with proper drainage. Use a lightweight potting mix, stake or cage plants for support, and place pots in a sunny spot (6+ hours of light). Dwarf or bush varieties (like ‘Tiny Tim’ or ‘Patio’) are ideal for small spaces.
Why are my young tomato plants wilting after transplanting?
Wilting is often due to transplant shock—root disturbance or sudden environmental changes. Water deeply (but not soggy) and avoid fertilizing for 1–2 weeks. If wilting persists, check for pests (aphids, spider mites) or fungal issues (like early blight). Fix it: Trim damaged leaves and mulch to retain moisture.
Should I plant tomatoes in the shade if my yard is too hot?
Tomatoes need full sun (6–8 hours daily), but in scorching climates (Zones 9–11), provide afternoon shade (e.g., with shade cloth) to prevent sunscald. If your yard is shady, opt for low-light-tolerant varieties like ‘Sungold’ or grow them near a south-facing wall for reflected heat.
Wrapping up and next steps
Planting young tomato plants at the right time—based on your USDA zone—sets the stage for a bountiful harvest.
By following frost-proof timing, choosing the right companion plants, and giving your vines the care they need, you’ll be well on your way to a thriving garden. Don’t let hesitation hold you back—your future juicy tomatoes are waiting!
🌱 Next Steps:
- Mark your calendar for your zone’s ideal planting window.
- Gather your supplies and get ready to dig in!
- Share your progress with fellow gardeners—#TomatoGardenJourney!