
How To
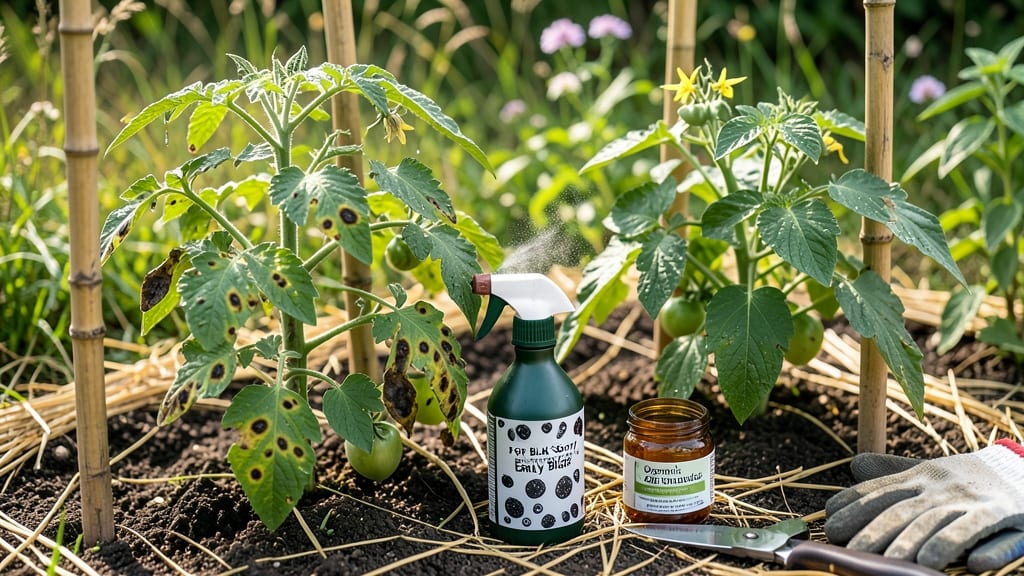
Tomato black spot treatment starts with two kitchen staples that work better than anything I've tried. 🌱 The moment you spot those telltale dark spots on leaves or fruit—especially in hot, humid weather—you'll want to act fast before the plant throws in the towel.
This neem oil and baking soda combo stops the spread in its tracks and keeps your tomatoes producing for weeks longer.
Here's the thing—this isn't just about spraying. Proper spacing between plants and watering at the base (not overhead) cuts off the disease's favorite conditions. I've saved entire plants by combining these treatments with basic garden hygiene, like removing infected leaves immediately.
The results? Plants that bounce back with new growth within 7-10 days of treatment.
You'll see the difference immediately after the first spray: no more spreading black spots, healthier green leaves, and tomatoes that stay blemish-free. The solution is non-toxic, works on other veggies too, and you can use it right up until harvest day—no waiting period required.
Works for home gardeners, container growers, and anyone tired of losing tomatoes to this stubborn fungus. Let's get those plants back in fighting shape!
Root Causes of Tomato Black Spot
Tomato black spot—scientifically known as Alternaria solani or early blight—isn’t just a random blemish on your prized tomatoes. It’s a fungal infection with specific triggers, and understanding them is the first step to stopping it in its tracks.
Below, we break down the key culprits behind this pesky problem, so you can address the real issues in your garden.
The primary cause of tomato black spot is the Alternaria solani fungus, which thrives in warm, humid conditions. These spores are everywhere—in soil, plant debris, and even on seeds. Here’s how they take hold:
- Surviving in soil: The fungus overwinters in infected plant residue, meaning last year’s tomato stems or leaves left in the garden can still harbor spores. If you’re planting tomatoes in the same spot year after year, you’re rolling out a red carpet for this pathogen.
- Wind and water spread: Spores hitch rides on wind currents or splashing water from irrigation (especially overhead watering). Once they land on tomato leaves, they germinate and create those telltale concentric black spots.
- Hot, humid weather: Temperatures between 77–86°F (25–30°C) and high humidity (above 75%) create the perfect breeding ground. This is why black spot is so common in summer gardens.
Actionable insight: Rotate crops yearly and remove all plant debris after harvest to starve the fungus of its winter home. Mulch with straw or grass clippings to keep soil moisture even and reduce spore splash.
Tomatoes under stress are like open invitations to fungal infections. When plants are weak, their defenses drop, making them vulnerable to Alternaria solani. Common stressors include:
- Overcrowding: Poor air circulation traps moisture on leaves, creating a fungal paradise. If your tomato plants are packed too closely, spores linger longer and spread faster.
- Nutrient deficiencies: Lack of key nutrients like potassium, phosphorus, or nitrogen weakens plant cell walls, making them easier targets. Yellowing leaves or stunted growth? Your tomatoes are crying for help.
- Water stress: Both overwatering (leading to soggy soil) and underwatering (causing wilting) stress plants. The fungus exploits these conditions to invade.
- Physical damage: Hail, strong winds, or even rough handling can create wounds where spores can enter. Think of it like an open door for the fungus.
Actionable insight: Space tomato plants 18–24 inches apart for airflow, use a balanced fertilizer (like 10-10-10), and water at the base (not overhead) to keep leaves dry. Avoid pruning during wet weather to prevent fungal entry points.
Black spot doesn’t just appear out of nowhere—it’s often brought into your garden through contaminated tools, soil, or even your hands. Here’s how:
- Dirty pruners or gloves: If you prune infected plants and then use the same tools on healthy ones, you’re spreading spores like confetti.
- Reused or infected compost: Compost made from diseased plant material can reintroduce Alternaria solani into your soil. Always compost only healthy, pest-free plant matter.
- Cross-contamination from other plants: Fungi like Alternaria can jump from infected potatoes, peppers, or even weeds to your tomatoes.
Actionable insight: Sterilize pruning tools with rubbing alcohol or a 10% bleach solution between uses. Avoid composting diseased plants, and quarantine new plants for a few weeks to spot early signs of infection.
Not all gardens are created equal—and neither are their microclimates. Black spot loves specific weather conditions, such as:
- Long periods of rain or high humidity: Wet leaves stay wet for more than 4–6 hours, giving spores the moisture they need to germinate. This is why black spot is worse in coastal or tropical regions.
- Morning dew: Dew creates a film of water on leaves, mimicking the ideal fungal growth environment. If your garden doesn’t dry out by mid-morning, spores get a head start.
- Stagnant air in greenhouses: Greenhouses trap heat and humidity, accelerating fungal growth. Poor ventilation turns them into pressure cookers for diseases.
Actionable insight: Choose dwarf or determinate tomato varieties for greenhouses (they handle humidity better), and use drip irrigation or soaker hoses to avoid wetting foliage. If rain is forecasted, apply a copper fungicide as a preventive measure.
Fixing Black Spots on Tomatoes
Now that you know the culprits behind those unsightly black spots on your tomatoes, let’s roll up our sleeves and tackle the problem head-on! 🌱🛠️ Whether it’s fungal infections, environmental stress, or nutrient deficiencies, these practical solutions will help you restore your tomato plants to their vibrant best.
---
Fungal diseases are the most common cause of black spots, and they thrive in warm, damp conditions. The good news? You can fight back with natural, effective treatments.
#### 🔥 Step 1: Remove Infected Leaves and Fruit Start by pruning any leaves or tomatoes showing black spots. Place them in a sealed bag and toss them in the trash (not the compost—fungi can survive and reinfect!). This stops the spread before it gets worse.
#### 🍳 Step 2: Apply a Fungicide Spray Mix one of these DIY fungicide solutions and spray your plants thoroughly, focusing on the undersides of leaves where fungi love to hide:
- Neem Oil Spray (Best for early blight) - 1 tbsp neem oil - 1 tsp mild liquid soap (as an emulsifier) - 1 quart water - Spray in the early morning or evening (avoid direct sunlight, which can burn leaves). - Reapply every 7–10 days until the problem clears.
- Baking Soda Solution (Great for preventing late blight) - 1 tbsp baking soda - 1 tsp vegetable oil (helps it stick) - 1 quart water - Spray on dry leaves (avoid wet foliage to prevent mildew). - Reapply every 5–7 days during rainy or humid periods.
- Copper Fungicide (For severe infections) - Follow label instructions for a store-bought copper-based spray (e.g., copper sulfate or copper hydroxide). - Apply in the evening to avoid leaf burn.
#### 👨🍳 Step 3: Improve Air Circulation Fungi spread faster in crowded, humid conditions. Space your plants 18–24 inches apart and prune branches to allow airflow. If growing in containers, ensure they’re not overcrowded.
#### 🌡️ Step 4: Adjust Watering Habits - Water deeply at the base of the plant (not overhead) to keep leaves dry. - Water early in the day so foliage has time to dry before nightfall. - Avoid letting water pool around the stems—this creates a fungus paradise.
#### 💡 Prevention Tip: Rotate crops yearly—don’t plant tomatoes (or nightshades like peppers/eggplants) in the same spot. Fungal spores linger in the soil!
---
Black spots from sun or heat stress usually appear as dry, crispy patches, often on the sun-exposed sides of tomatoes. Here’s how to fix it:
#### 🌿 Step 1: Provide Shade Cloth If your tomatoes are in a hot, sunny spot, drape lightweight shade cloth (30–50%) over them during peak afternoon heat (12 PM–4 PM). This prevents scorching without stunting growth.
#### 💧 Step 2: Mulch Heavily Spread 2–3 inches of organic mulch (straw, grass clippings, or wood chips) around the base of plants. This keeps roots cool and retains moisture, reducing stress.
#### 🥘 Step 3: Water Consistently - Deep water every 2–3 days (adjust for your climate). - Use drip irrigation or soaker hoses to deliver water directly to the roots. - Avoid wetting leaves—this can lead to fungal infections while trying to prevent sunburn!
#### ✨ Prevention Tip: Choose heat-tolerant tomato varieties like ‘Solar Fire,’ ‘Heatmaster,’ or ‘Arkansas Traveler’ if you live in a hot climate.
---
Black spots can also signal a nutritional imbalance, especially if they appear as blossom-end rot (dark, sunken spots on the fruit) or yellowing between leaf veins.
#### 📊 Step 1: Test Your Soil Use a DIY soil test kit (available at garden centers) or send a sample to your local extension office. This helps identify if you’re missing calcium, magnesium, or potassium.
#### 💪 Step 2: Fix Deficiencies Fast - For Calcium (Blossom-End Rot): - Sprinkle crushed eggshells around the base of plants (let them decompose for 1–2 weeks). - Use a calcium nitrate solution (1 tbsp per gallon of water) and foliar spray. - For Magnesium (Yellow Spots Between Veins): - Apply Epsom salt (1 tbsp per gallon of water) as a soil drench or spray. - For Potassium (Weak Growth, Poor Fruit Set): - Use wood ash (sparingly—too much raises soil pH) or a potassium-rich fertilizer like greensand.
#### 🎯 Step 3: Adjust pH if Needed Tomatoes thrive in slightly acidic soil (pH 6.0–6.8). If your soil is too alkaline, amend it with peat moss or sulfur to improve nutrient uptake.
#### 🔥 Prevention Tip: Add compost or well-rotted manure to your soil before planting for a steady supply of nutrients. Avoid over-fertilizing with nitrogen—it leads to lush leaves but poor fruit quality!
--- To keep black spots at bay, make these habits part of your gardening routine: ✅ Rotate crops every 3 years to prevent soil-borne diseases. ✅ Clean up debris after harvest—remove all plant material from the garden. ✅ Space plants properly for airflow and sunlight. ✅ Monitor humidity—use a hygrometer to keep levels below 70%. ✅ Choose disease-resistant varieties (look for labels like ‘VFN’ for virus/fungal resistance).
--- With these targeted fixes, your tomato plants should bounce back stronger than ever! 🍅💚 Stay vigilant, and soon you’ll be harvesting juicy, spot-free tomatoes all season long.
Frequently asked questions about tomato black spot
Why do black spots appear on my tomatoes even after I've treated them?
Black spots often return if spores remain in your soil or garden environment. Always remove infected leaves and debris completely, rotate crops yearly, and avoid overhead watering. The fungus can survive in old plant material, so thorough cleanup is key—don't compost infected plants!
Can I still eat tomatoes with black spots?
Yes, but only if the spots are small and superficial. Large black spots or those on the fruit's surface may affect taste and texture. Always wash tomatoes thoroughly before eating. For severe cases, harvest only the unaffected fruit and destroy the rest to prevent further spread.
How often should I apply neem oil for black spot prevention?
Apply neem oil spray every 7-10 days during warm, humid weather or whenever you notice new growth. For active infections, treat immediately and repeat weekly until symptoms disappear. Always apply in the early morning or evening to avoid leaf burn from sunlight.
Will my tomato plants recover completely from black spot?
With prompt treatment, plants often recover within 2-3 weeks, producing new healthy leaves. However, severe cases may cause permanent damage. Focus on preventing future outbreaks by improving airflow, using resistant varieties, and maintaining proper garden hygiene.
Can I use the same baking soda solution on other plants?
The baking soda solution works on other fungal issues like powdery mildew on peppers, cucumbers, and roses. Just adjust the recipe: 1 tbsp baking soda + 1 tsp oil + 1 quart water. It's safe for most plants when used as a preventive spray during humid conditions.